A relighting of of this game cut-scene in Sequencer. Watch as these two enemies go up against each other in a video game match. Who will be champion?
Type of project:
Lighting Project
Duration:
2 Week
Software used:
Unreal Engine 4
Asset Pack:
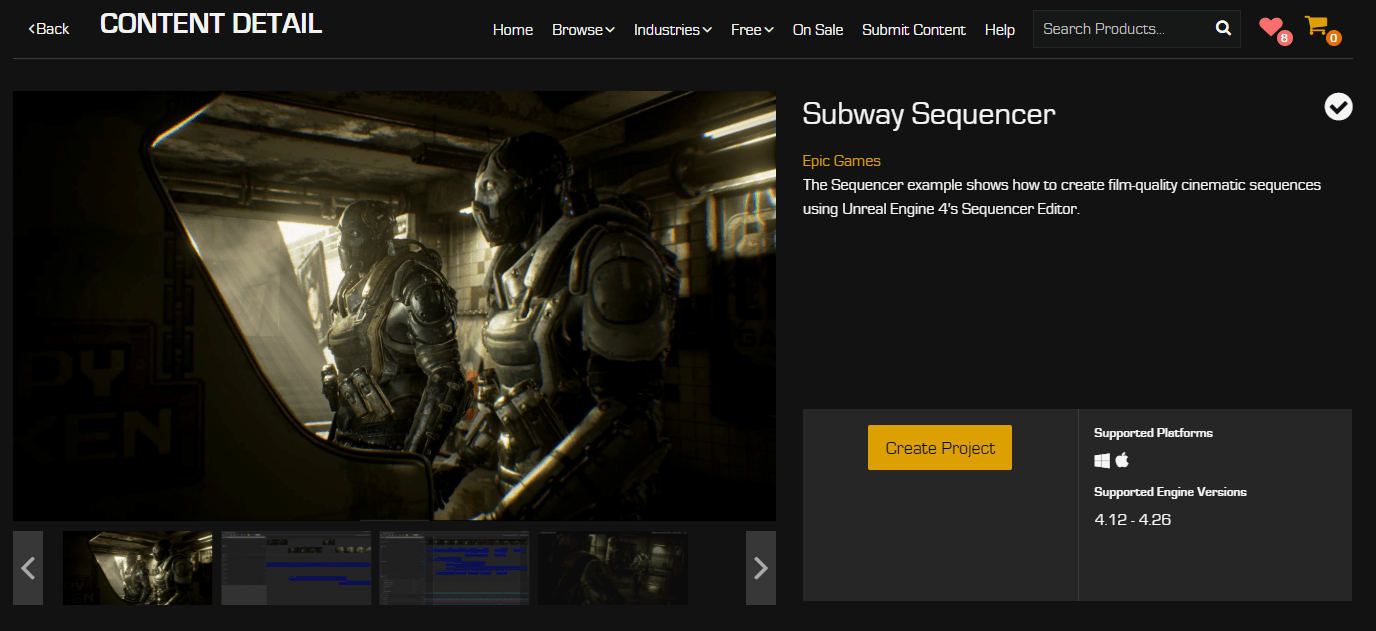
Subway Sequencer
Objectives
Working with an interior environment.
Lighting the scene for a fixed or limited camera perspective.
Considering special cases: dynamic conditions, moving platforms, scripted lights.
Setting up simple reflections.
Setting up Lightmass Importance volume.
Adding Fog, Color Gradient, and Post-Processing
Working with 3-point light rig, determining readability.
Integrating the characters with the background lighting.
The Solution
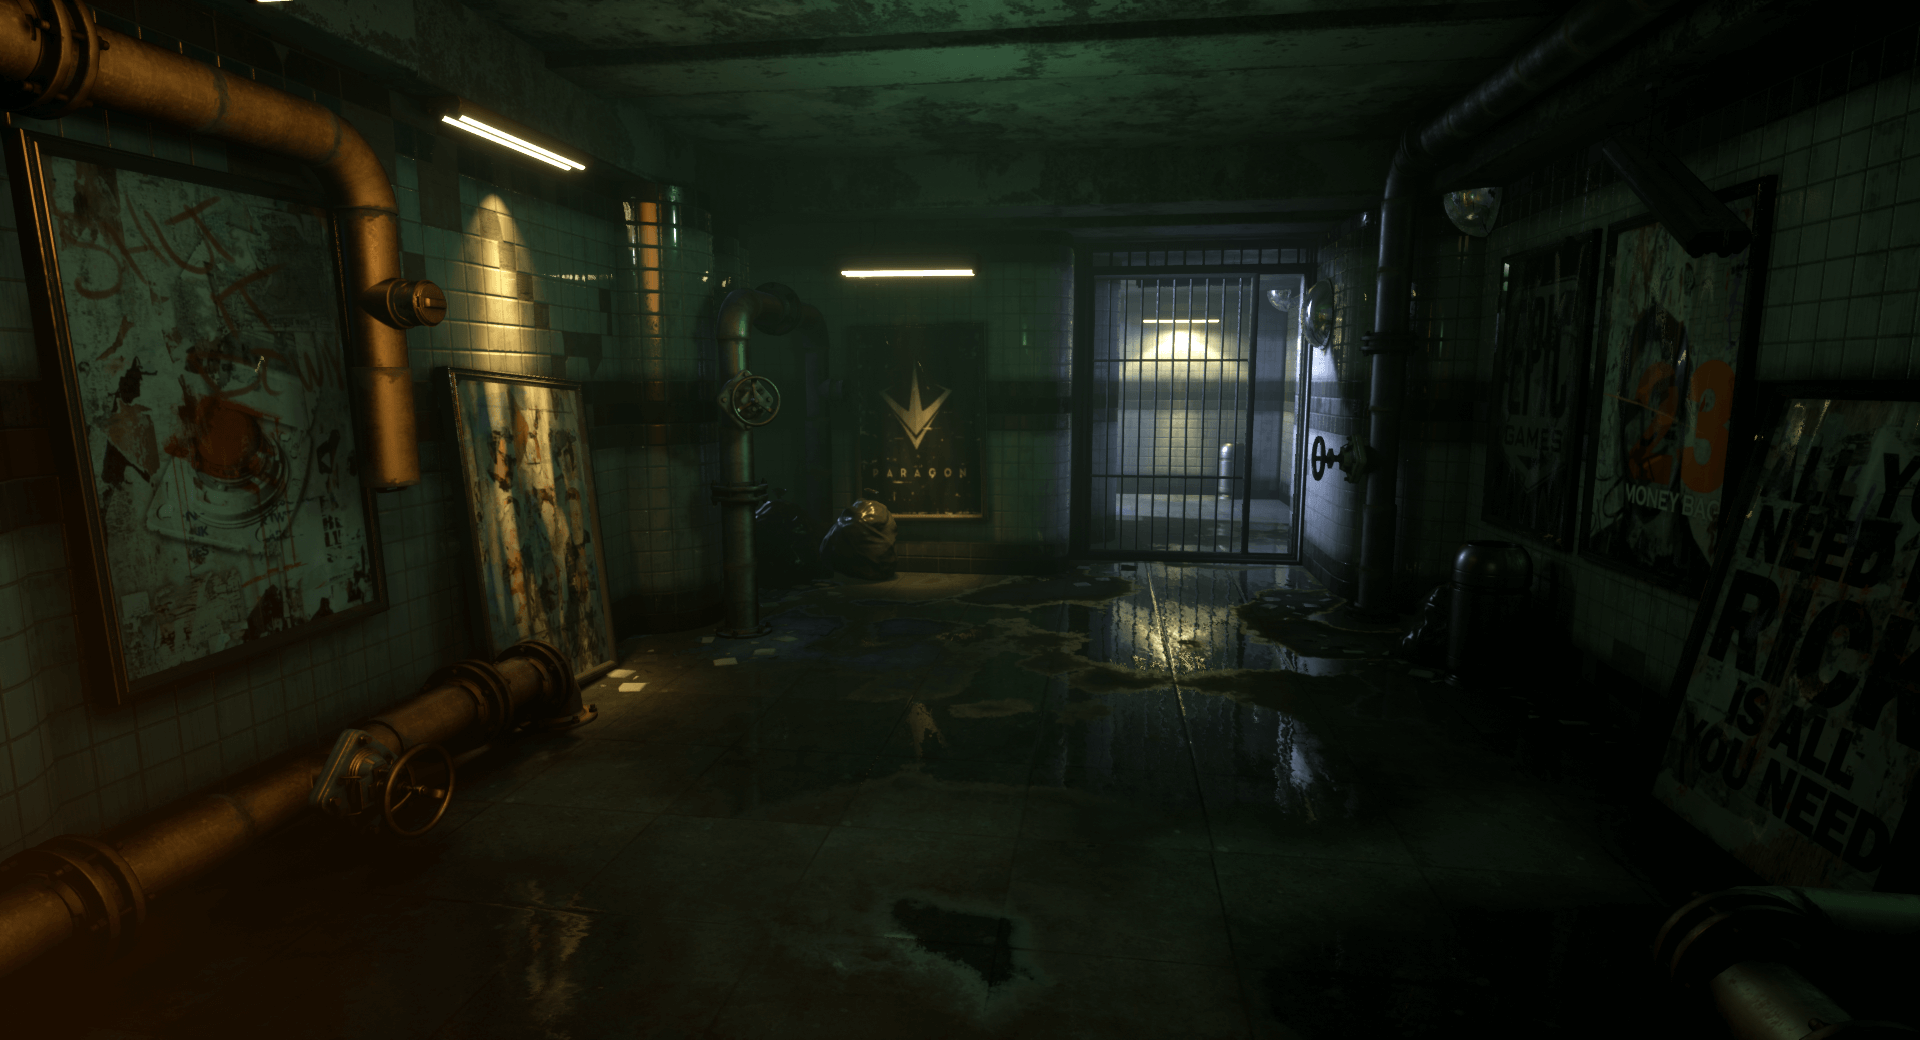
Learning from CGMasterAcademy on The Art of Lighting for Games course and FIEA’s Level Design classes has taught me valuable, in-depth techniques on how to light video games and the pipeline and process of how to think like a Lighting Artist. My skills have increased over the course and while I was working on my Masters’s degree. Here is my progress over the weeks for the Action RPG Lighting.
I was responsible for all stages from concept to completion of lighting.
I designed and documented the mood and feel of the environment.
I went through the Lighting Artist Pipeline and removed lights from the file to put in my own.
I calibrated the sun to fit the time of day.
I added appropriate fill lights, spotlights, and fog.
I created a color gradient for the post-processing.
Worked with characters and limited camera perspective.
Sequencer Videoplay:
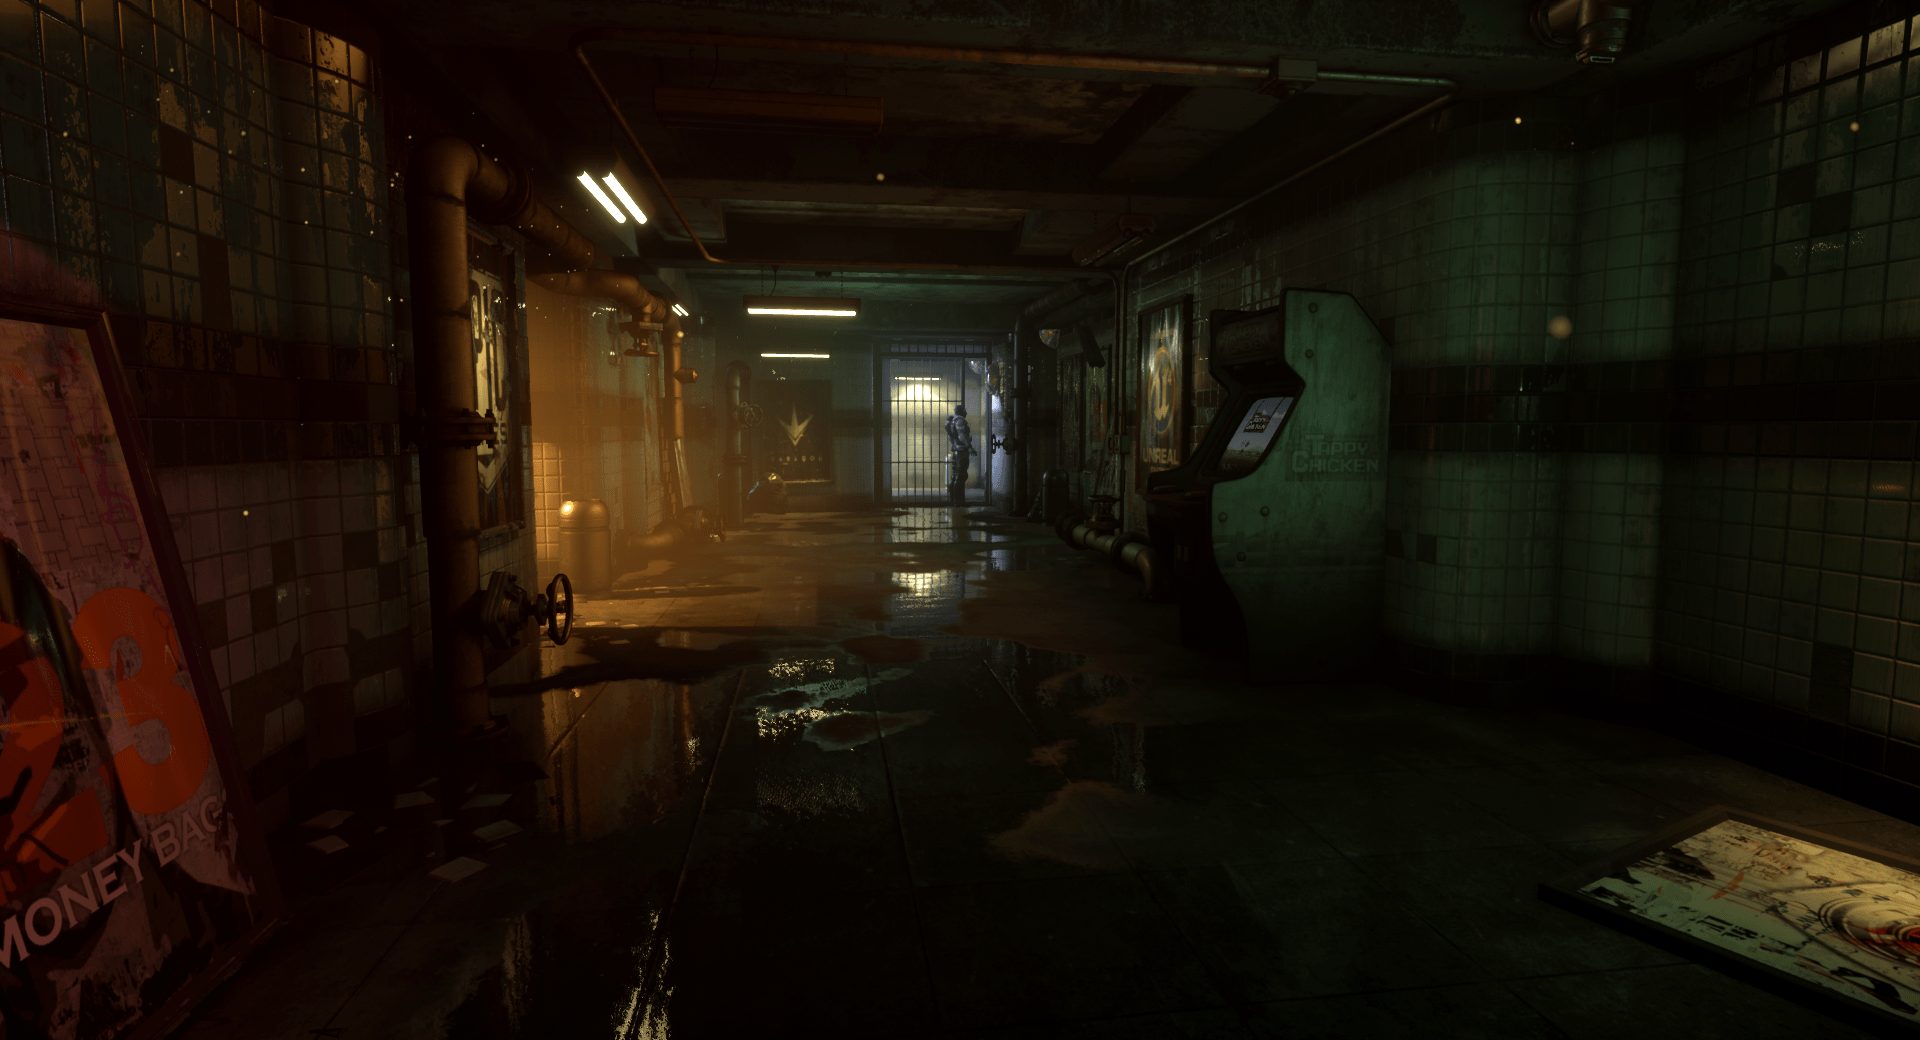
Environment Image Gallery:
Character Image Gallery:
My Process-
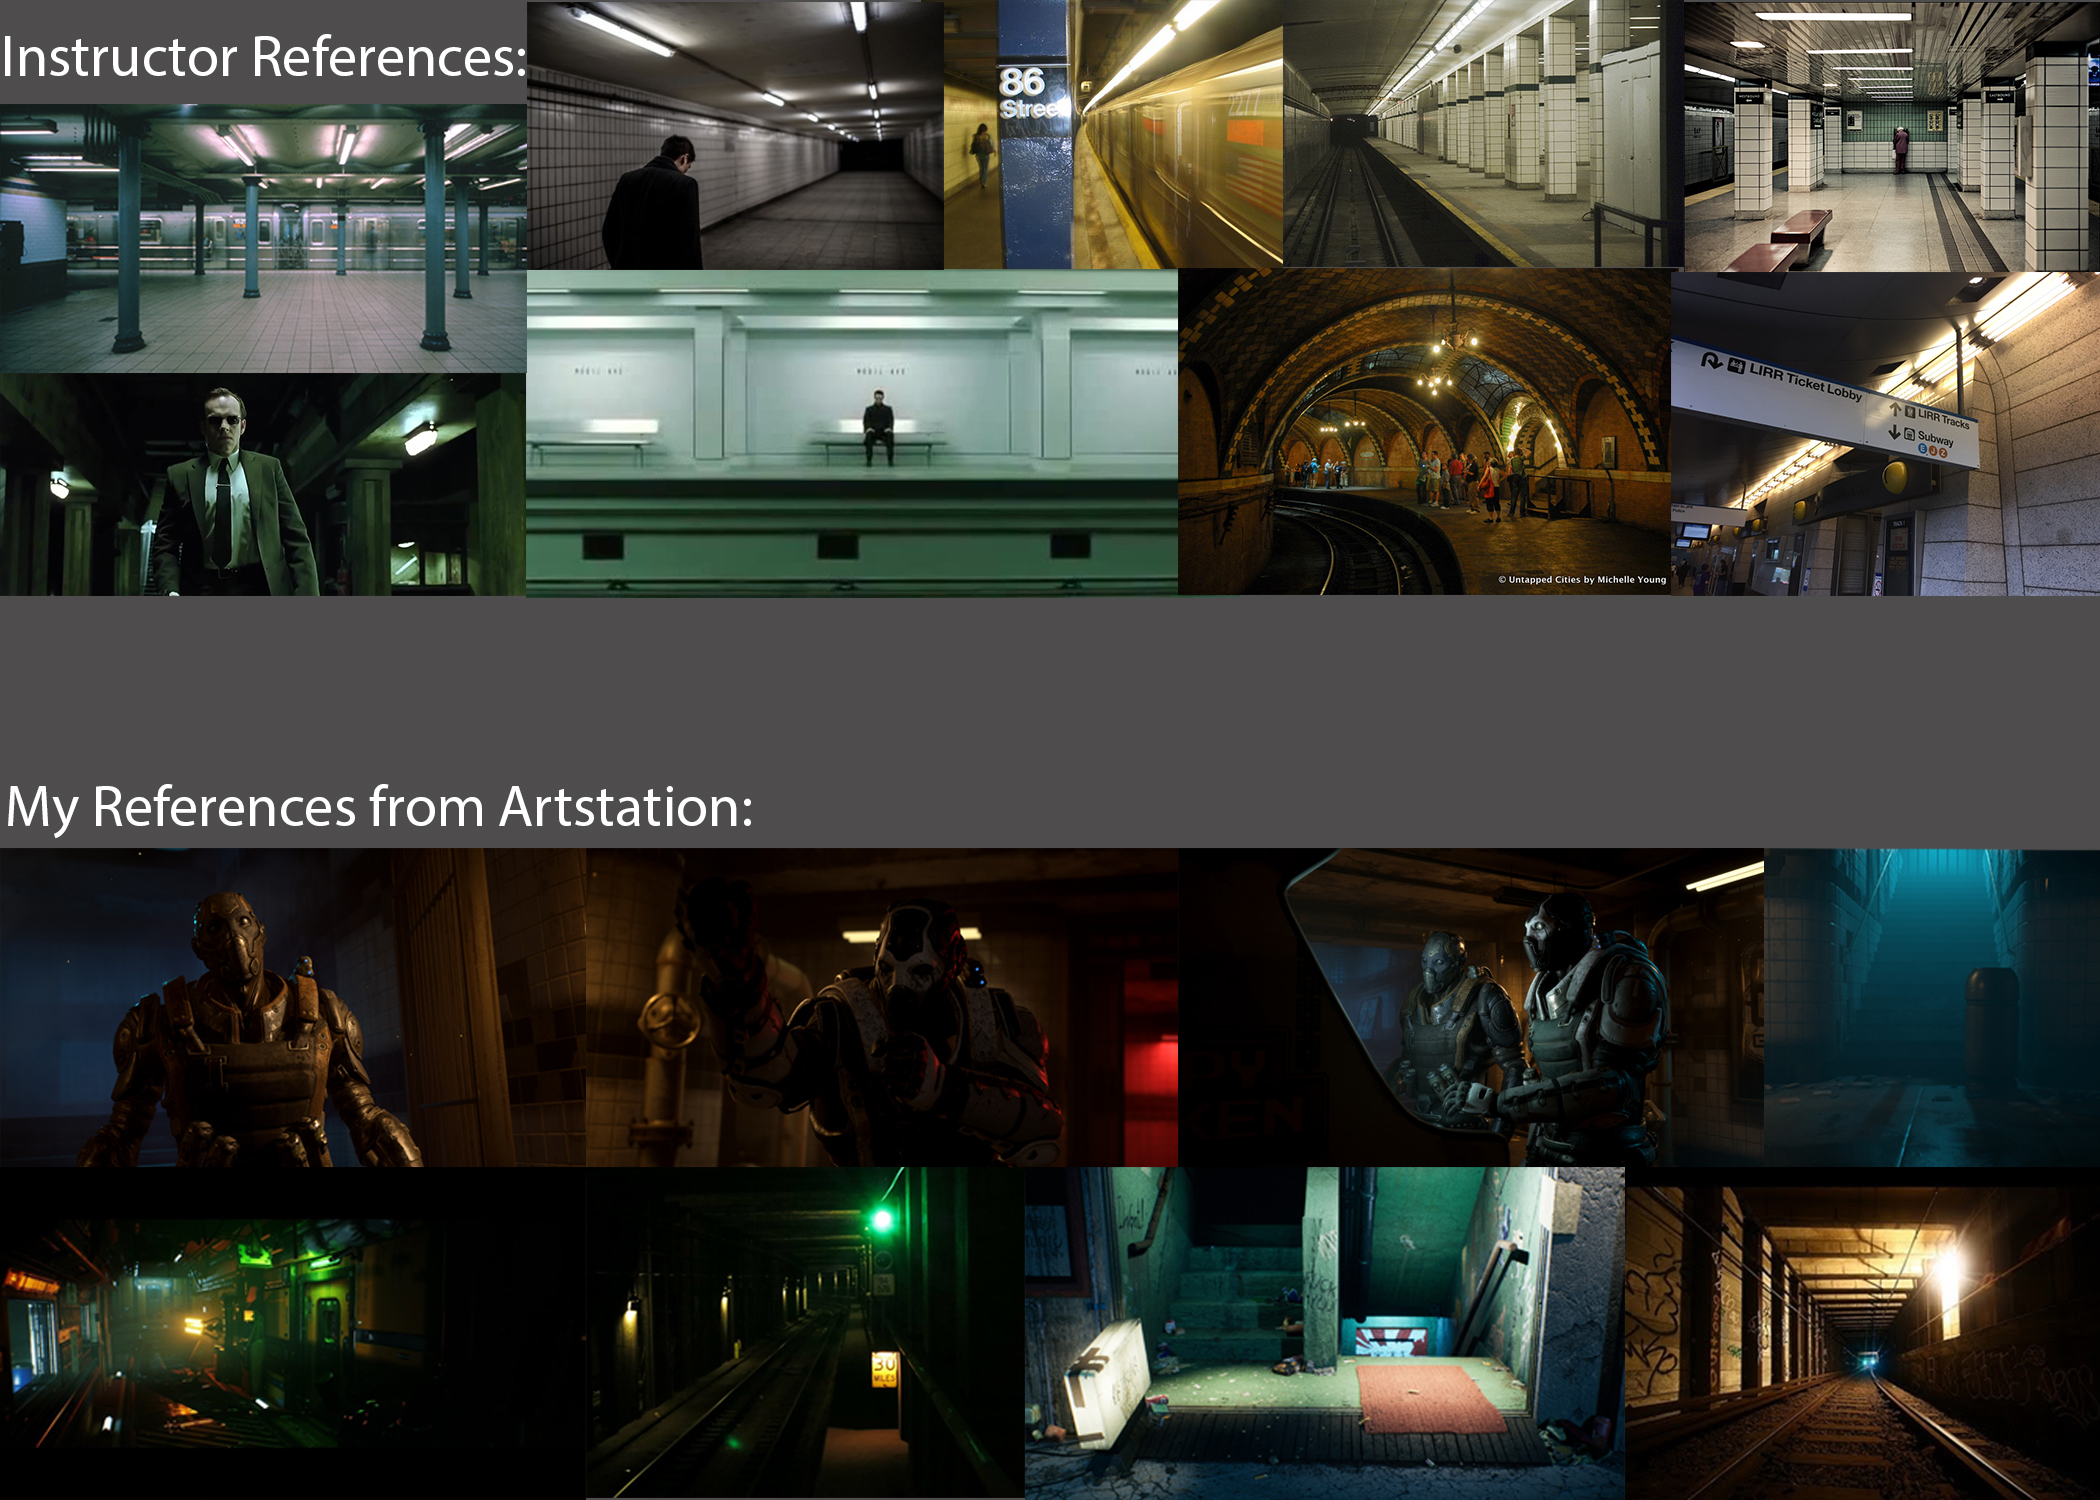
References:
Before starting the lighting of any scene I create a reference mood board, so I have an idea of the look and feel of the scene I want to try and capture in the chosen environment.
This helps me determine a few things like the desired temperature of the lights, mood, feel of the environment, Sky Sphere adjustments, and Sun Calibration. Also the importance of effective gameplay guidance and path for the player.
Choosing an Asset Pack:
The majority of the time I have the asset pack in mind or I go through epic Store’s free Asset packs. I download the asset pack and make sure everything is updated. An important thing that I do once the asset pack is loaded is turn off auto exposure. I keep in mind that this is for Gameplay purposes, and that I will need to make sure that the player needs to be able to see all areas of the map. I also check my computer screen’s brightness and adjust it to 100% while I am working with lighting.
Remove Lights:
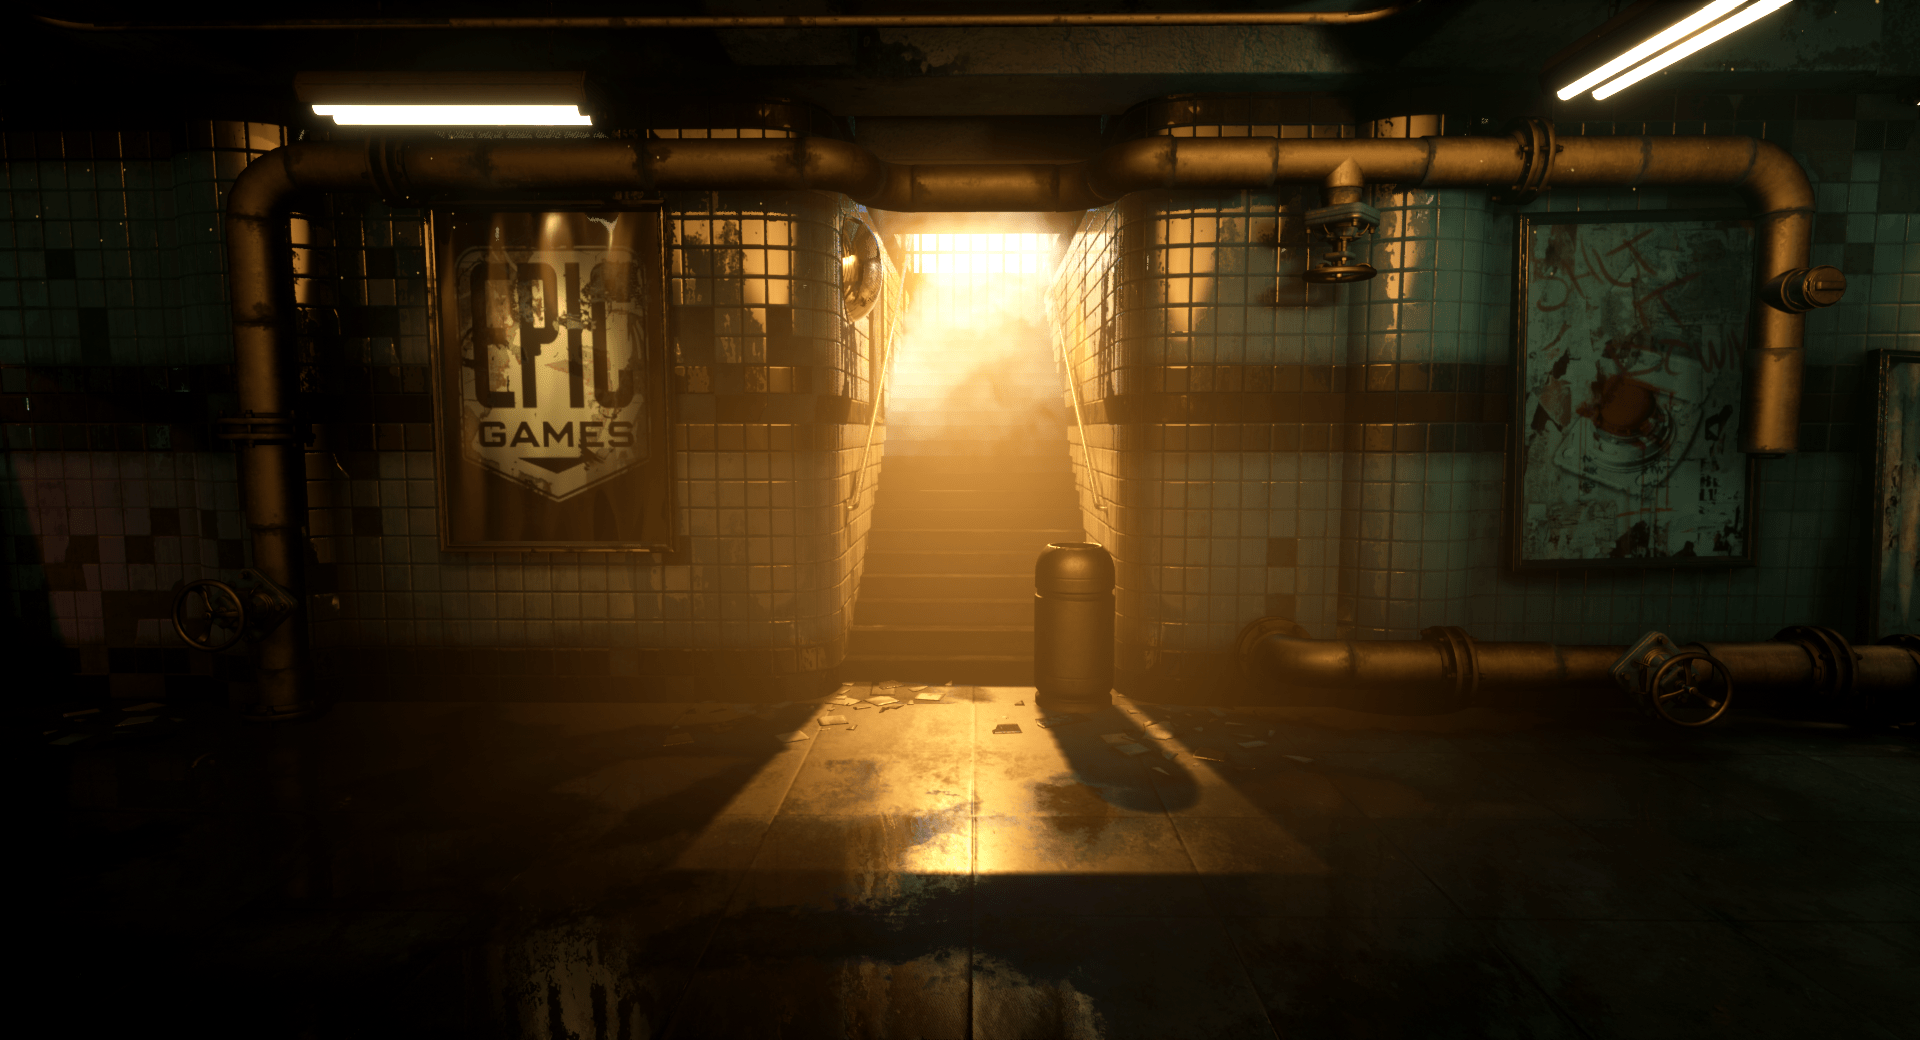
I then stripped out all of the point lights, spotlights, directional light, sky light, fog, reflections, post-processing, and light mass importance volumes from the entire level. I changed the given sky sphere with a more suitable HDRI for the night scene I wanted and made a custom-made sky sphere in Autodek Maya.
I then started by dropping in a directional light and connecting it to the sky sphere. Here I calibrated the HDRI to fit the night sky by using the Sunny 16 rule and fixed the exposure in Photoshop and then I reimported the HDRI. I manipulated the color, angle, and intensity of the directional light to give a more night environment. For an outdoor scene like this, I set it to moveable.
Once I have achieved the directional light and angle I am going for the scene, I add in the skylight. I match the skylight and directional light and color with the appropriate night settings.
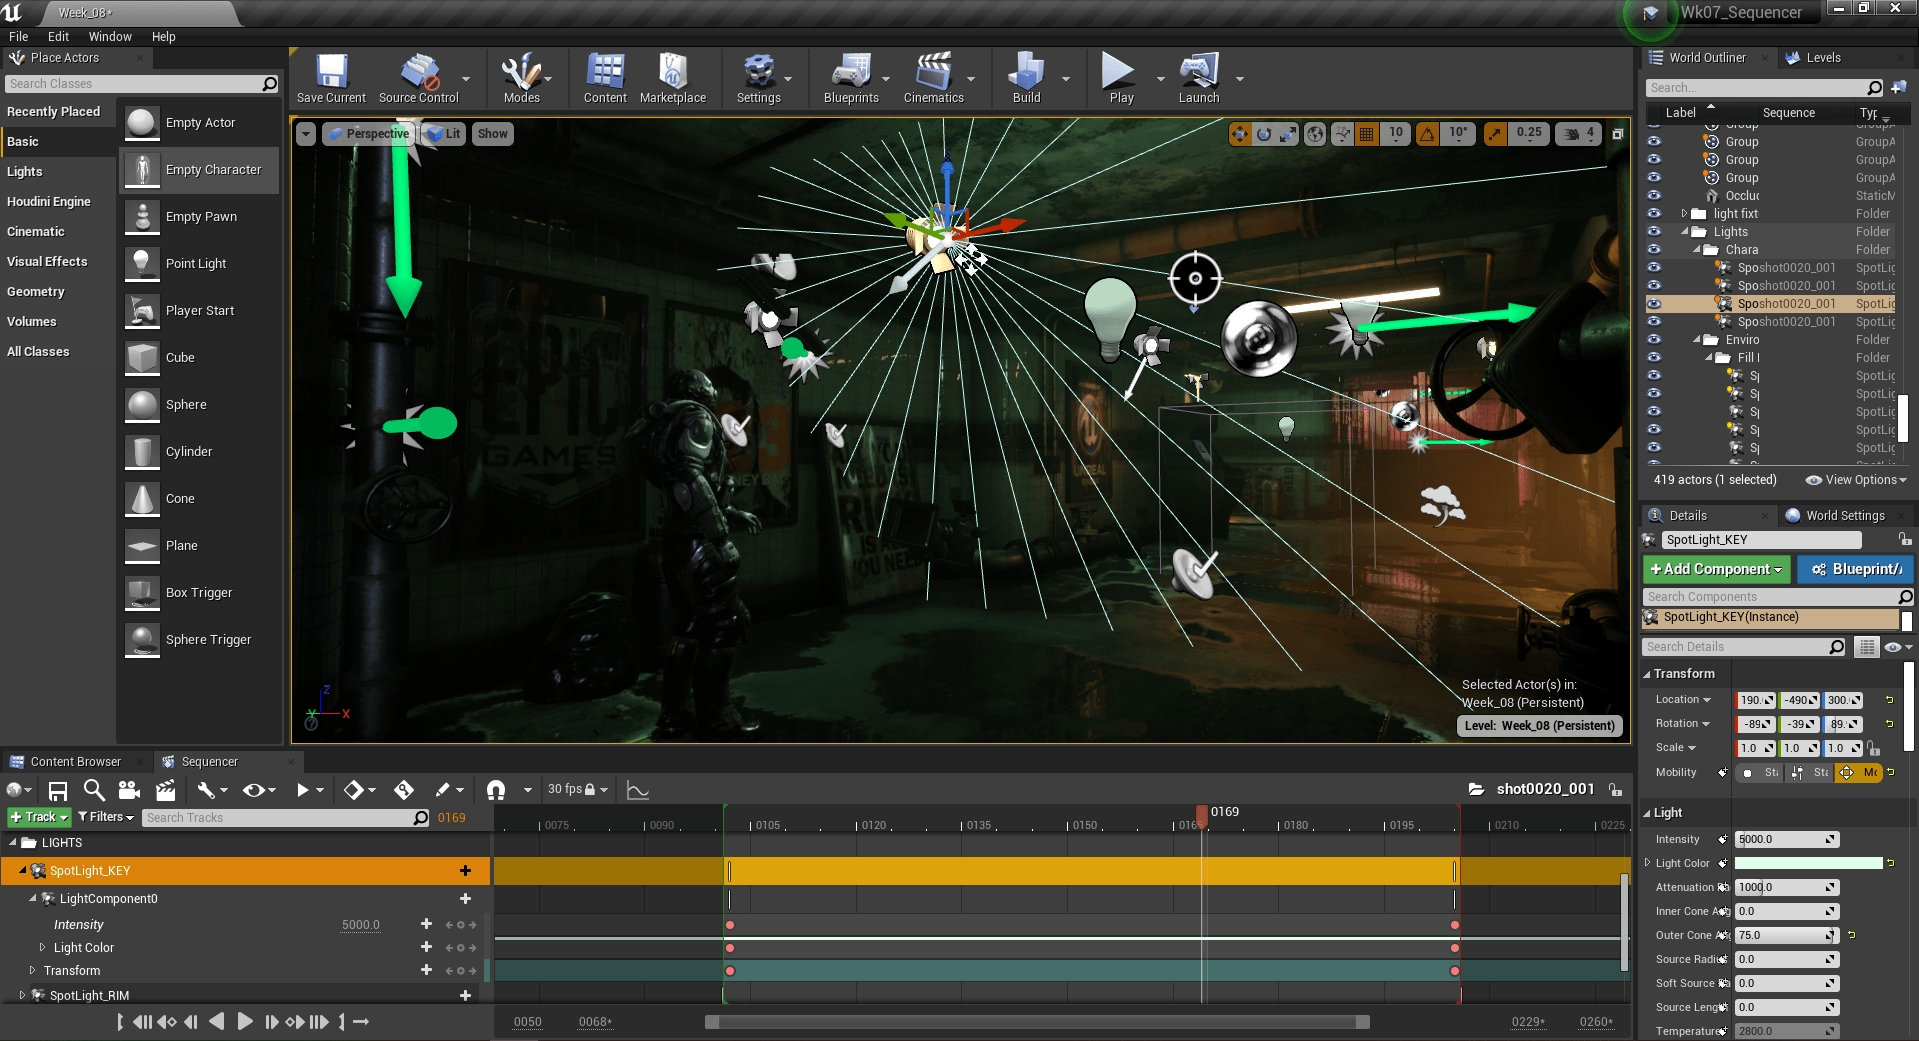
Adding back in Lights:
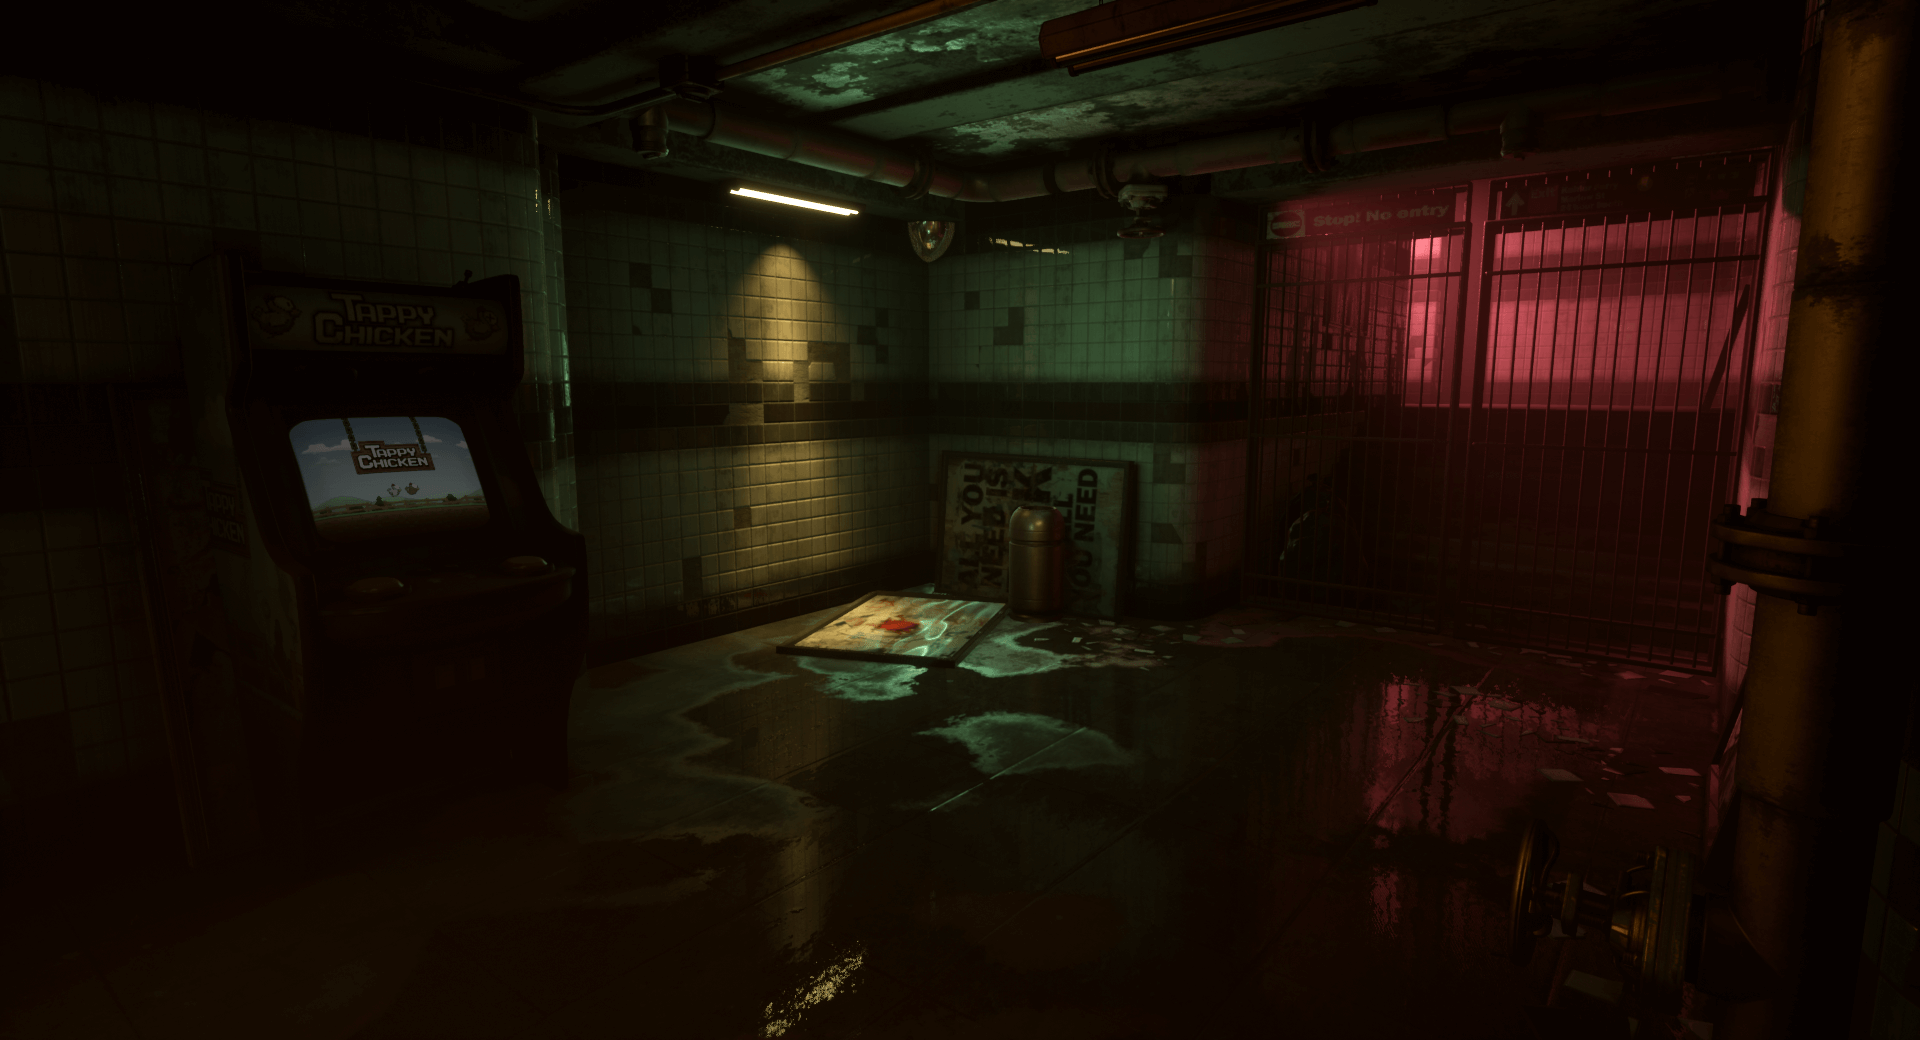
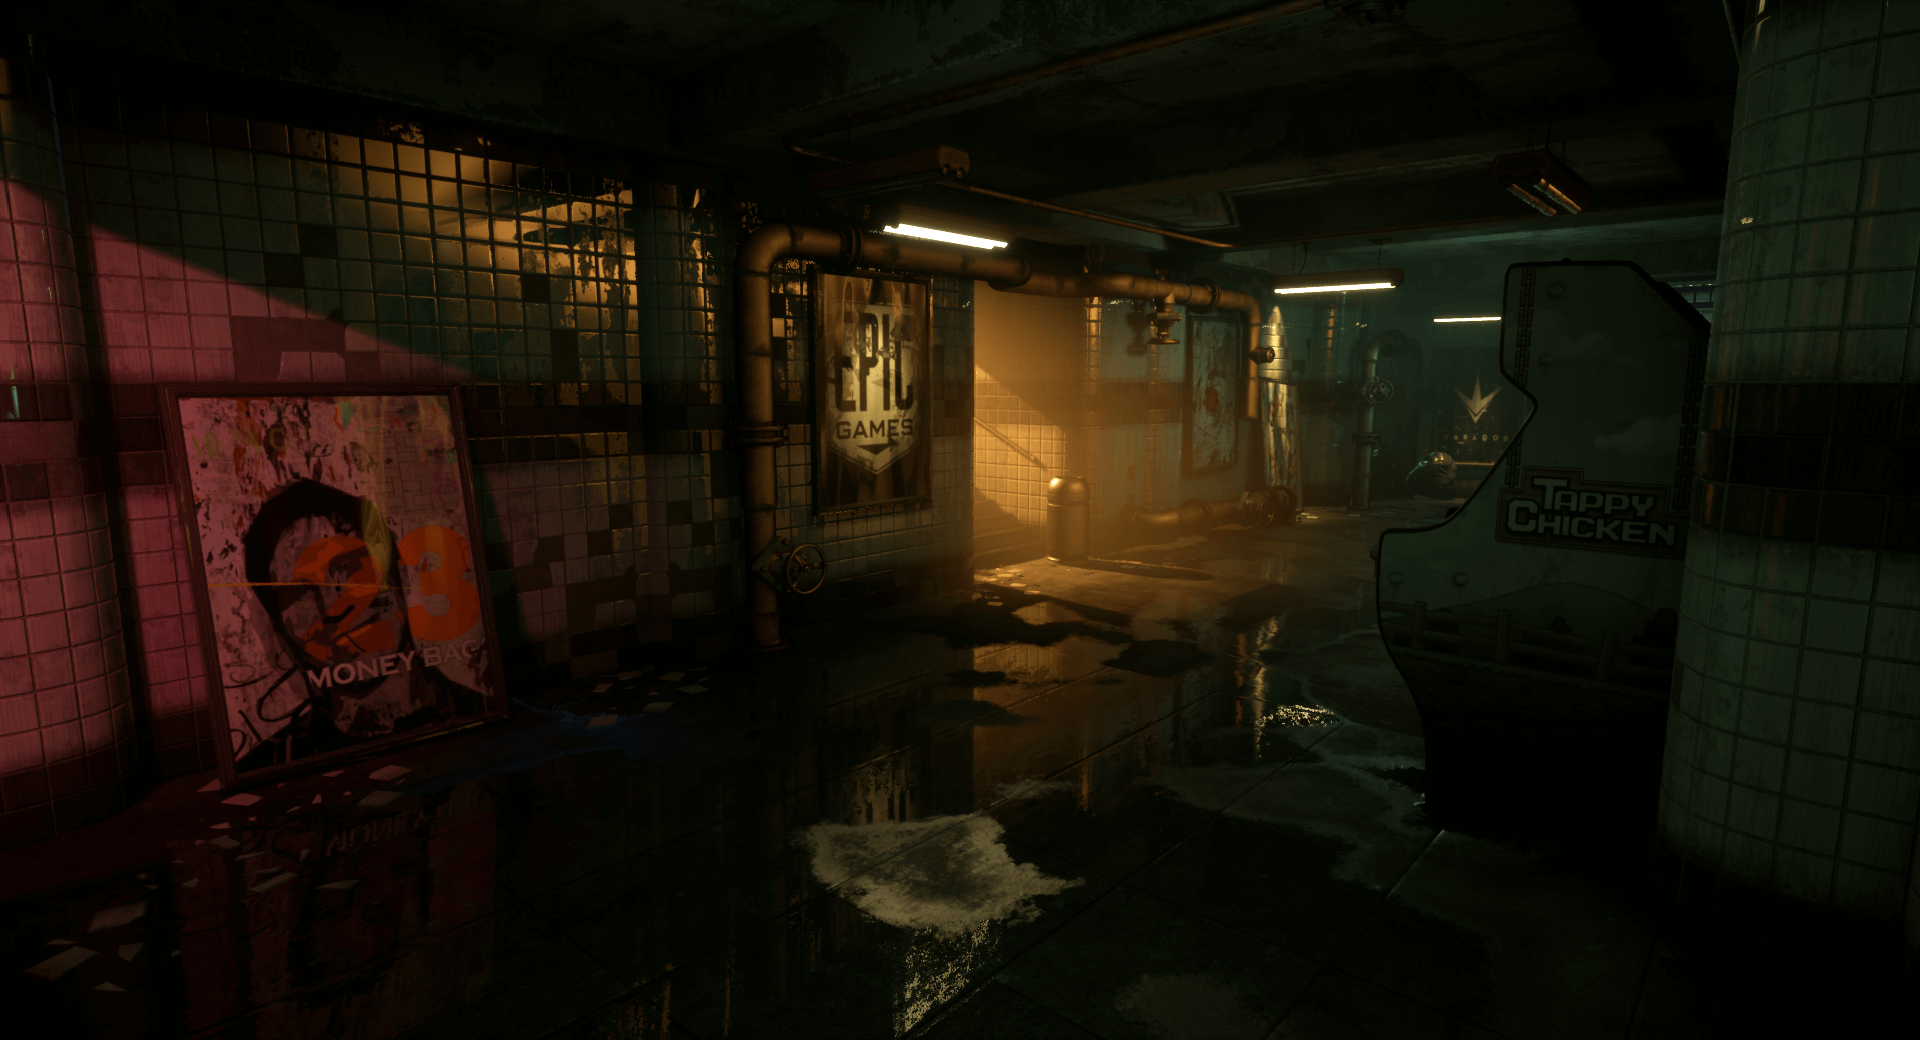
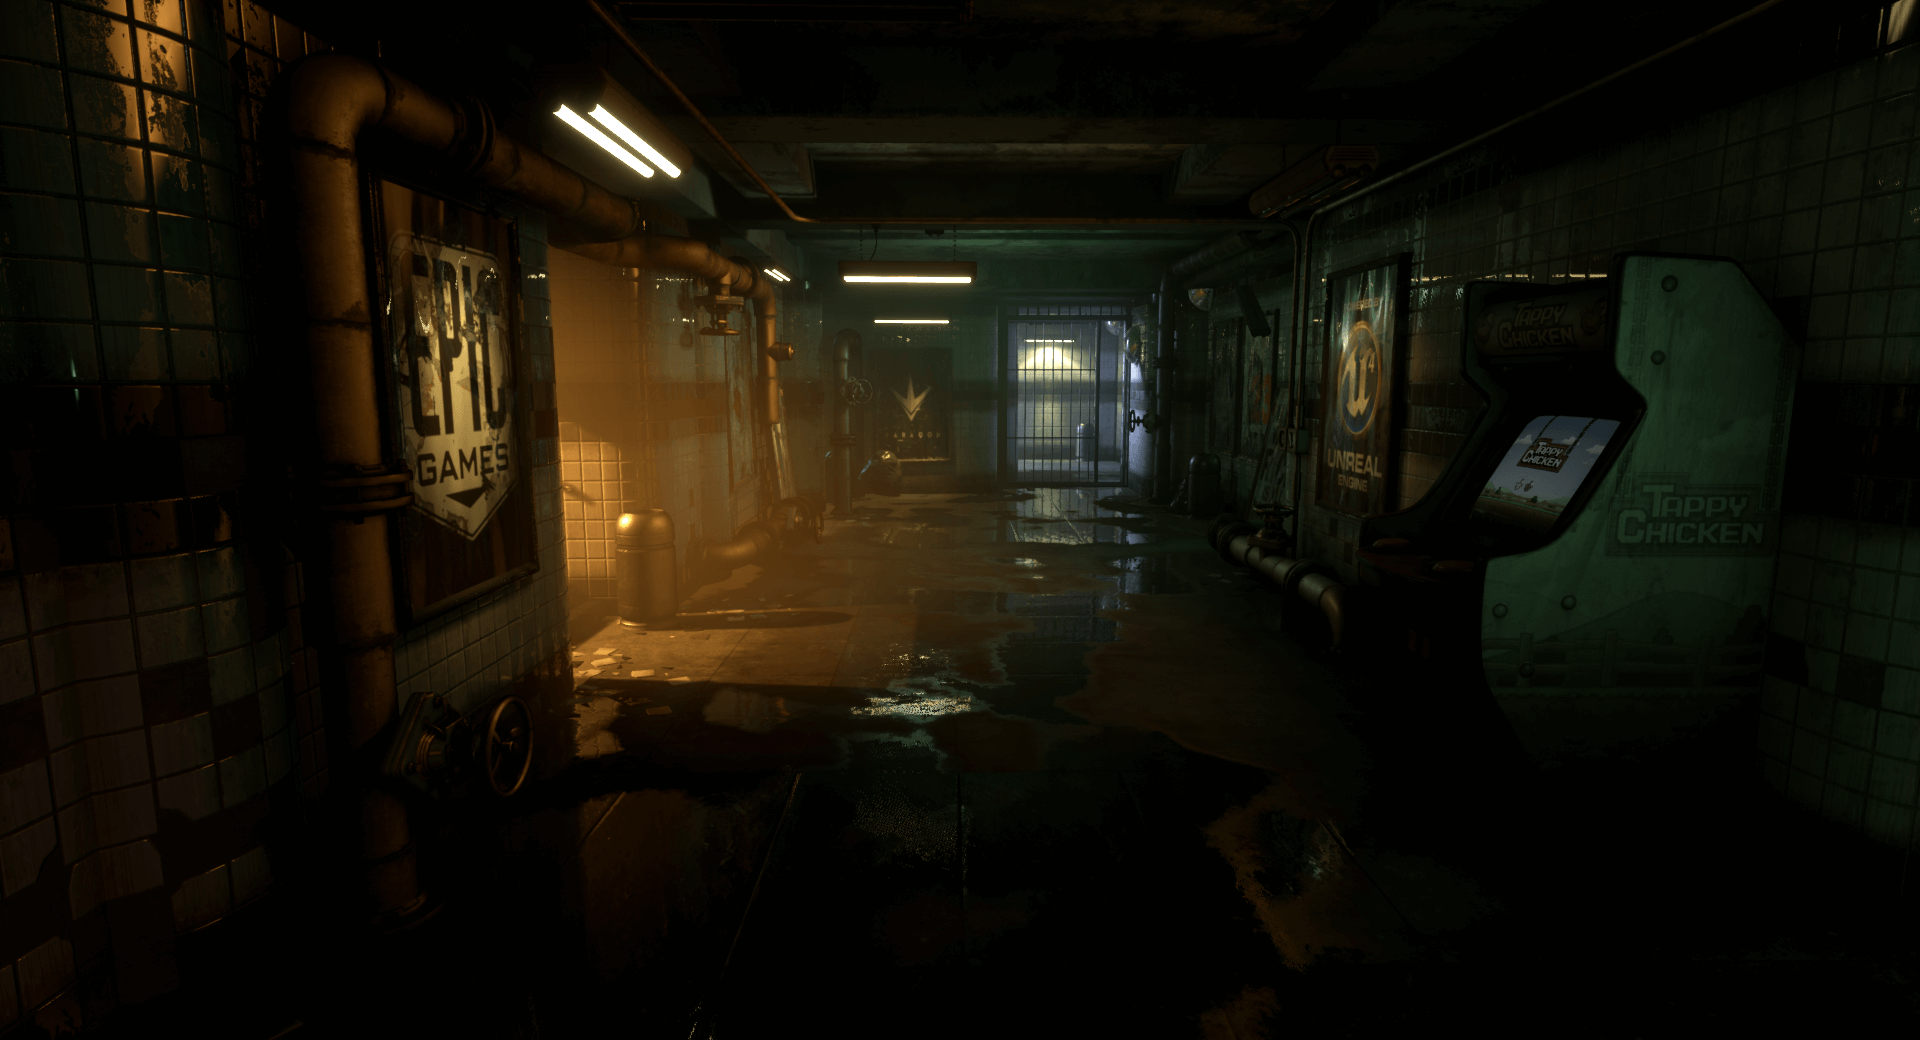
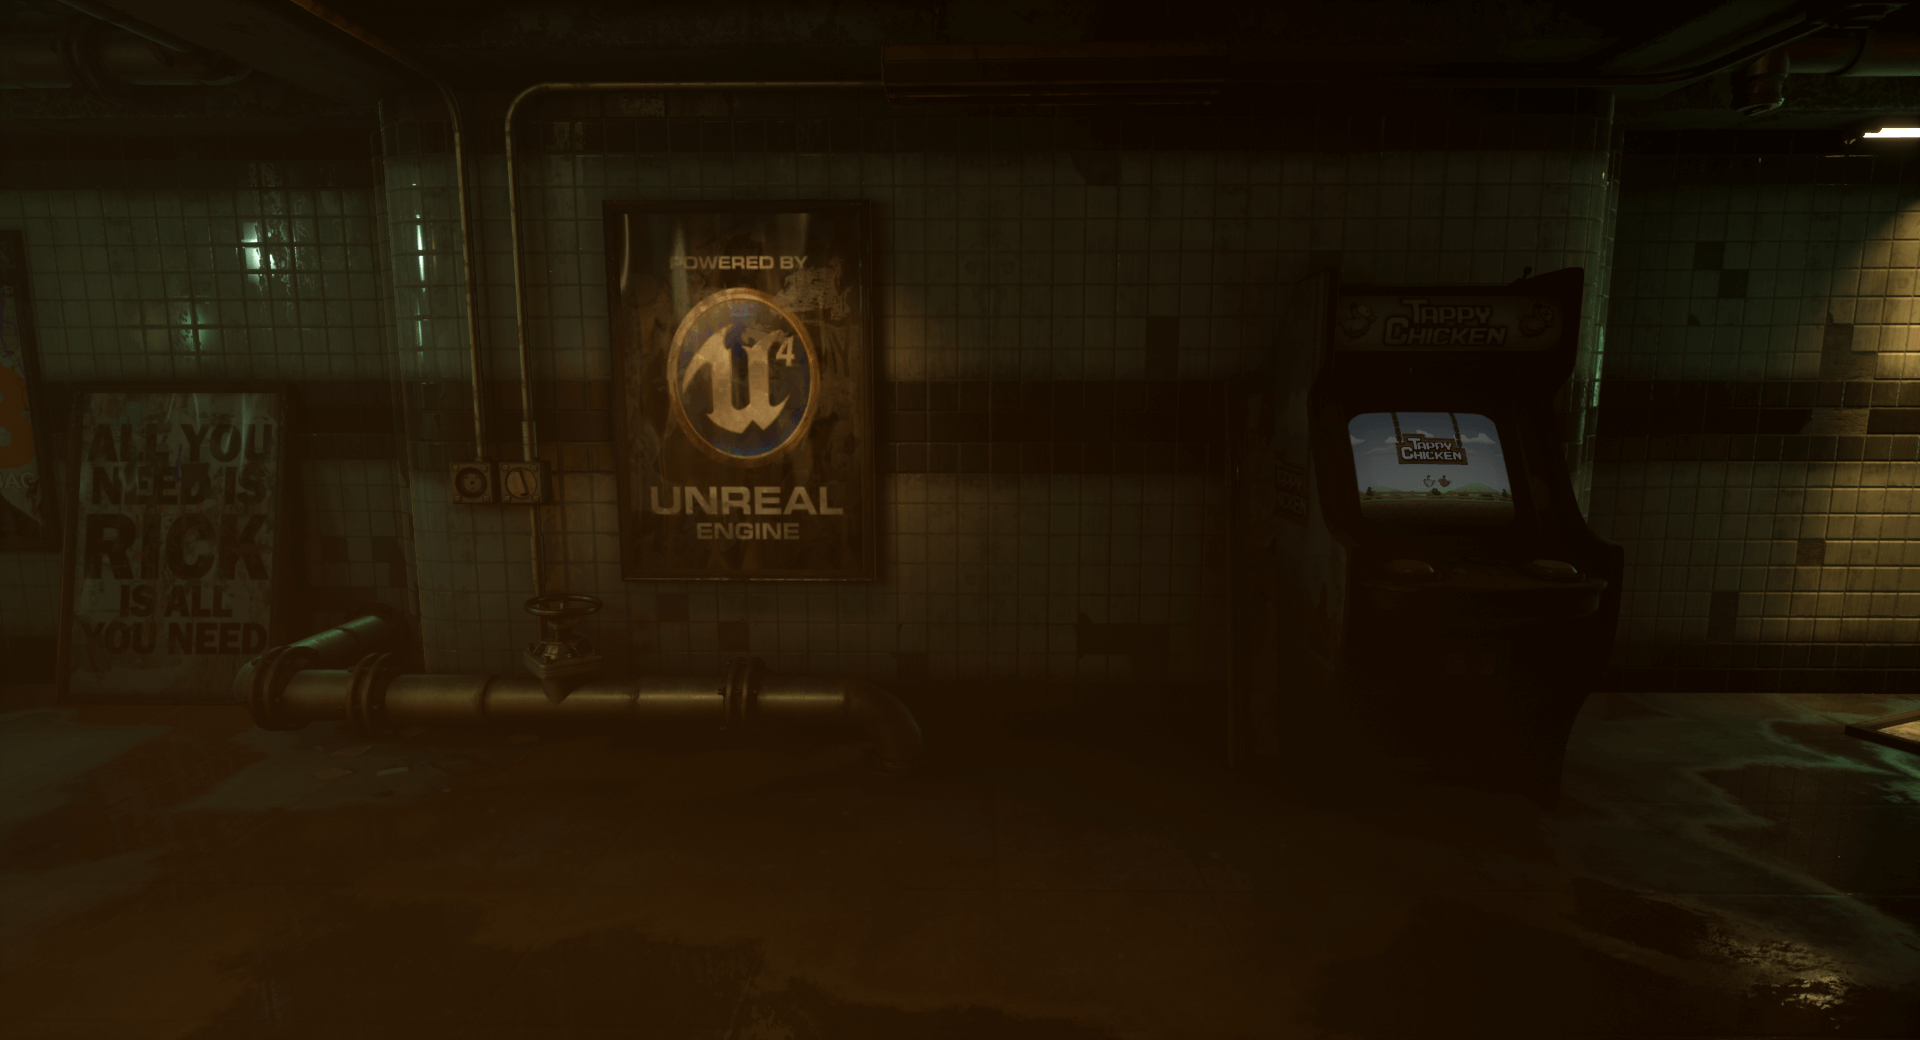
I then start on adding point lights and spotlights as needed. For example, the light fixtures were given spotlights set to real-world lumens lighting of a subway light. The point lights were added to fill areas of the subway to give dark shadow pockets of light.
I included a light mass importance volume around the playable scene in order to build lighting so I may test the level as I proceeded.
I also add reflection spheres around the map to enhance the reflections in certain darker areas.
Adding Fog:
I have added the exponential height fog. I have spent a lot of time working with this feature. I made changes to the many settings like the color of exponential height fog, density/extinction scale of fog, start and view distance, volumetric fog settings, and scattering distribution. Once I was satisfied with the settings I was able to build lighting and test the gameplay.
Character Lighting in Sequencer:
After I am happy with the environment lighting in my map, I will then go into the Sequencer folder to go to each scene and work in the lighting sections. I can focus on each scene’s lights and make sure it is matching the rest of the environment. Sometimes certain scenes will get their own enhanced lighting intensity and directions. There was much testing involved.
I was trying to go with dark vibe character readability and integration into the scene, as well as contrast. I stayed on task trying to lead the viewer’s eye to the important aspects of each shot. With more time I would have added more lights in certain areas of the scene. I tried to take it slow for each character to have their own Key and Rim lighting depending on the scene being used. I had to test the scene many times in slow motion and then review it at regular run time.
Post Processing And Final Touches:
Lastly, I added a post-process volume where I set it to unbound to cover the entire map, and then take 4 screenshots of the area. I then go into Photoshop, where I put all 4 photos together in a layer, and add a color look-up table (CLUT). I then changed the exposure, added curves values, and added contrast and color. Once I am satisfied by the overall look of the pictures, I crop out the CLUT and save it. I make sure that my new CLUT, once imported, is set to “Color Look-Up Table”. I then put my CLUT in my Post-Process Volume called “Color Gradient”.
Finally, I enter the post-process settings to further enhance the scene within the engine itself. Some settings I work with are the exposure settings, camera settings ( Shutter speed, ISO, and Aperture), depth of field, Image Effects, and lens flares.
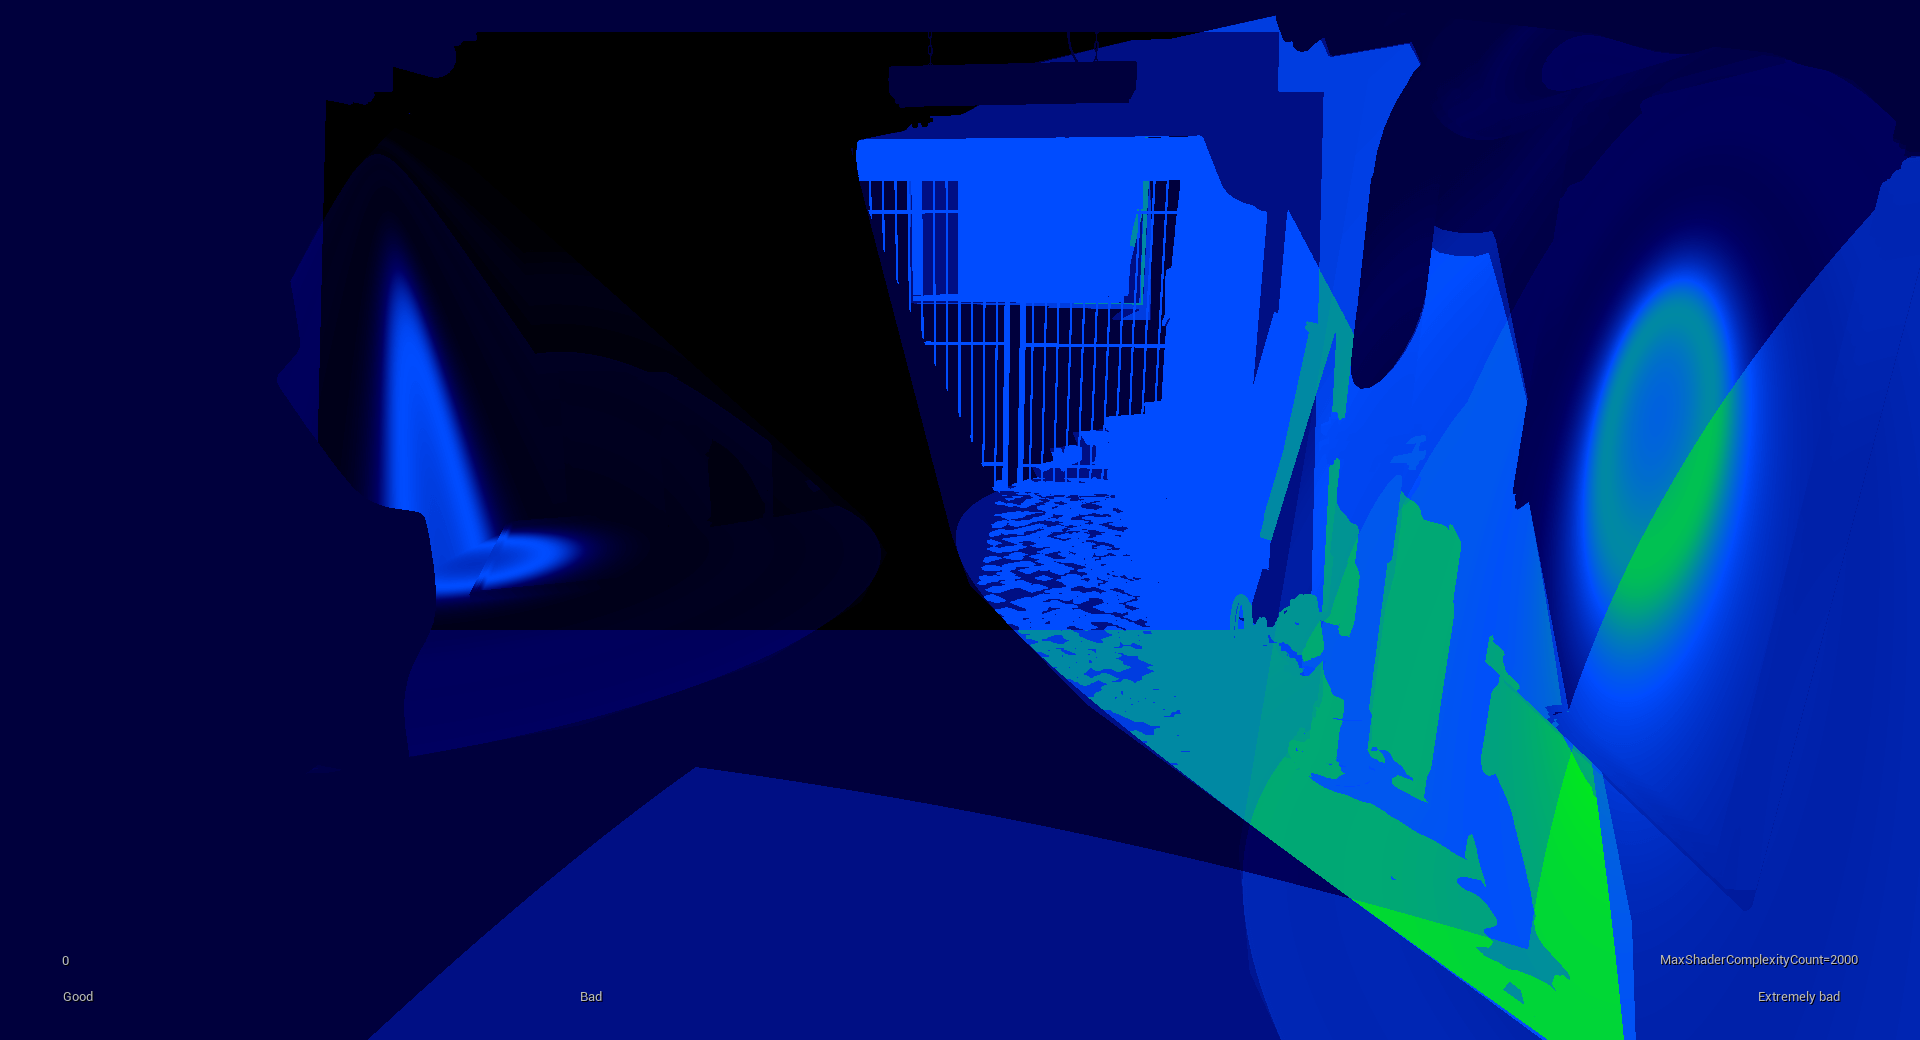
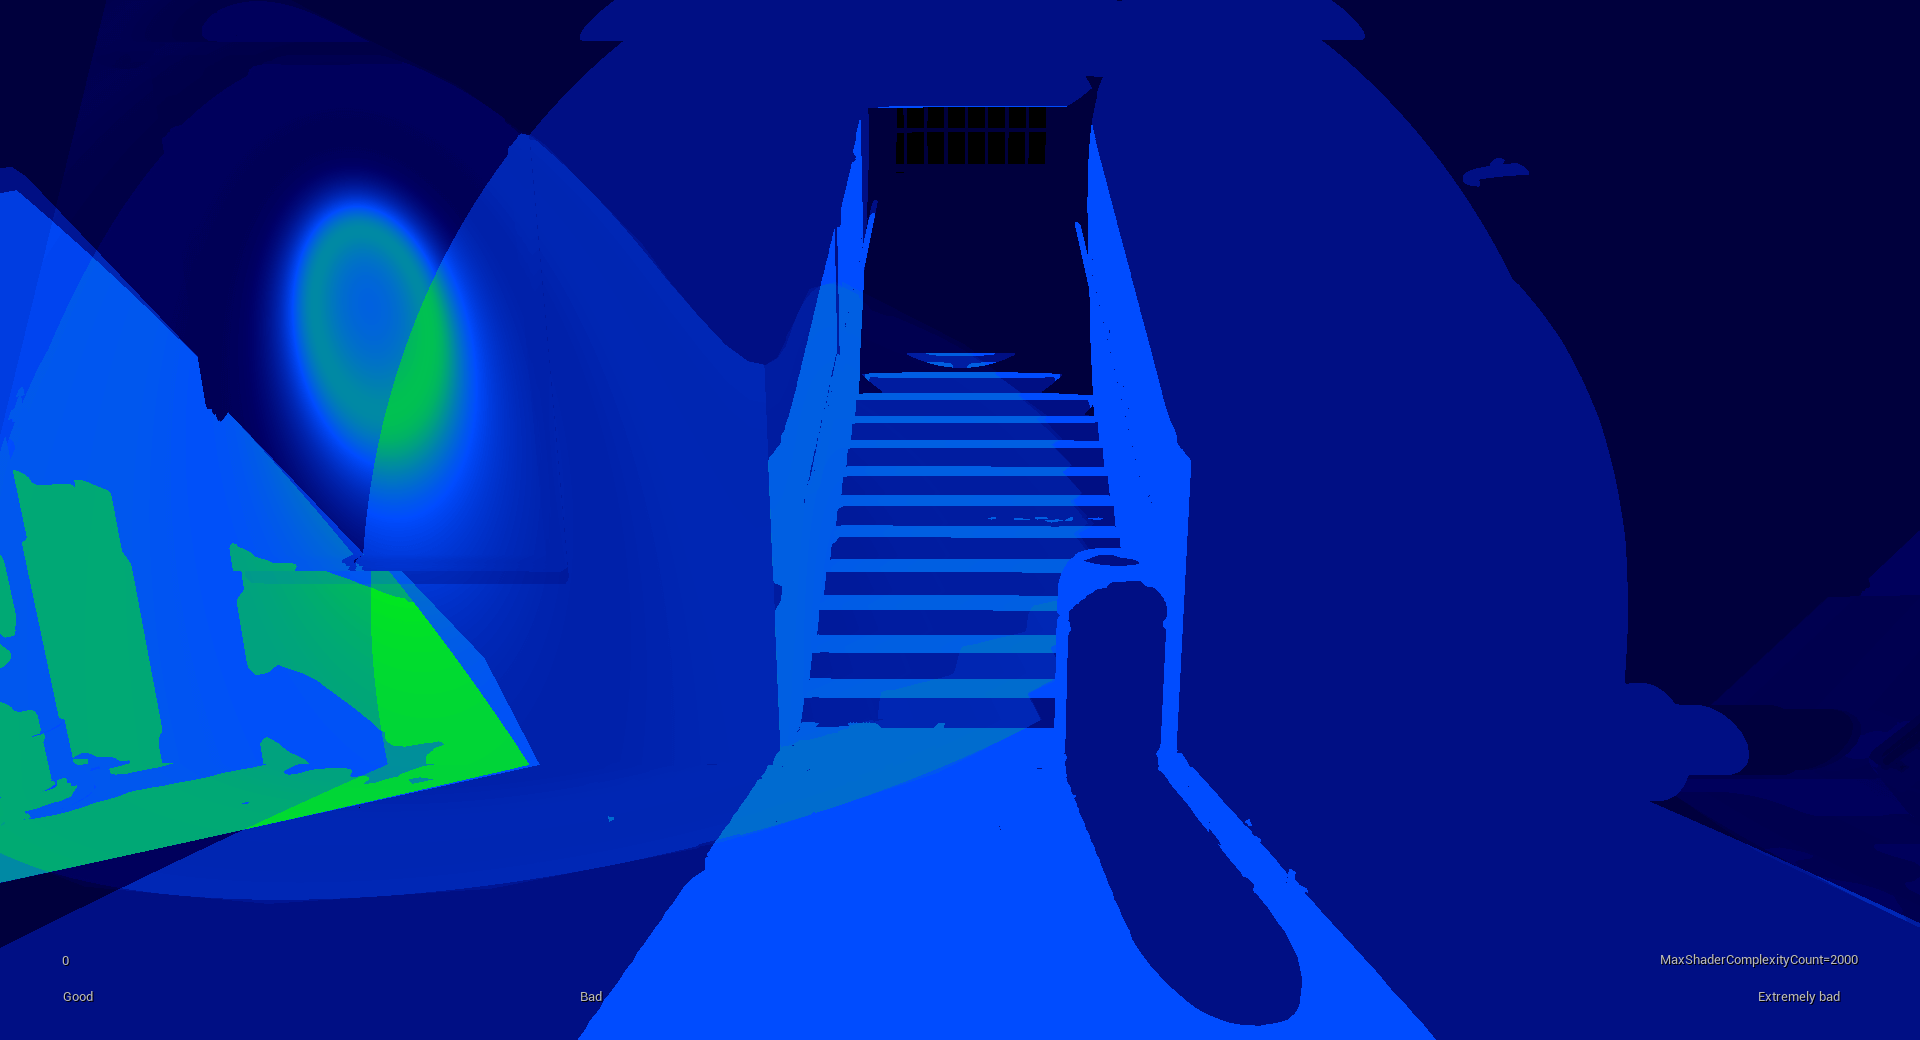
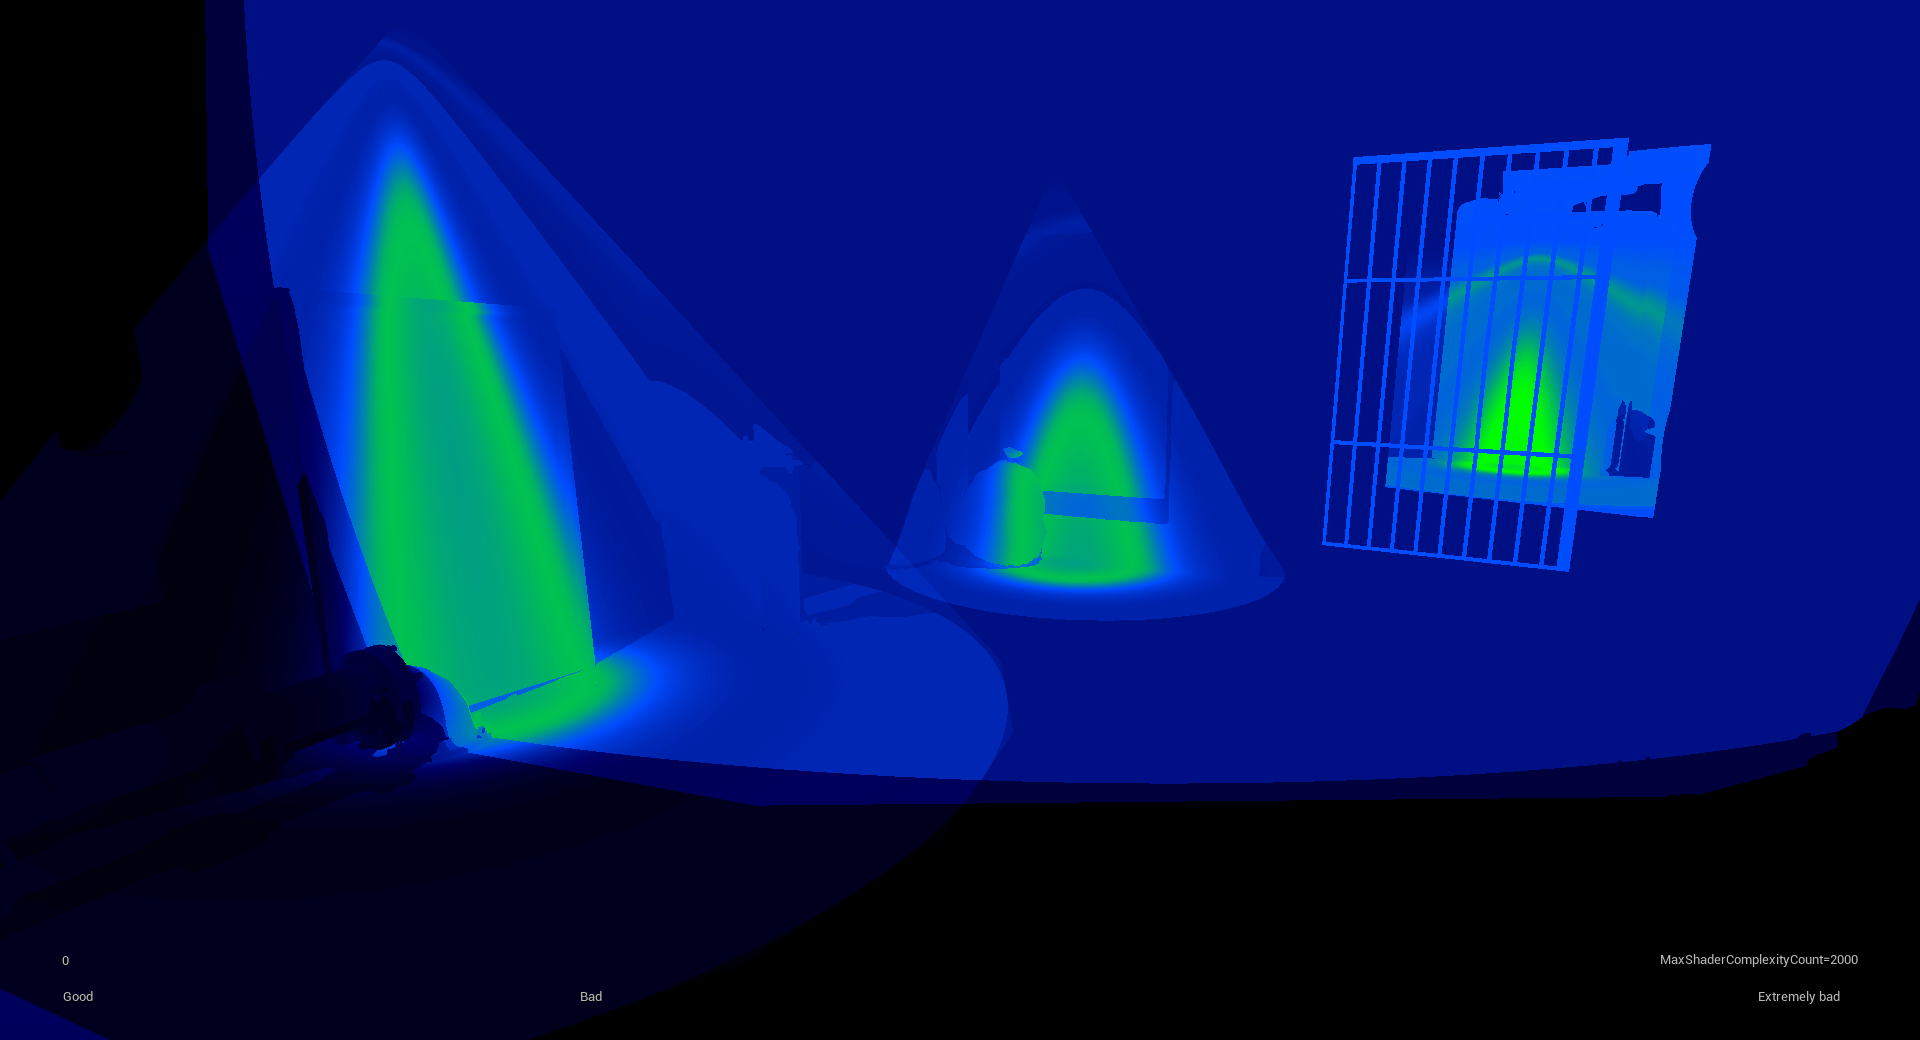
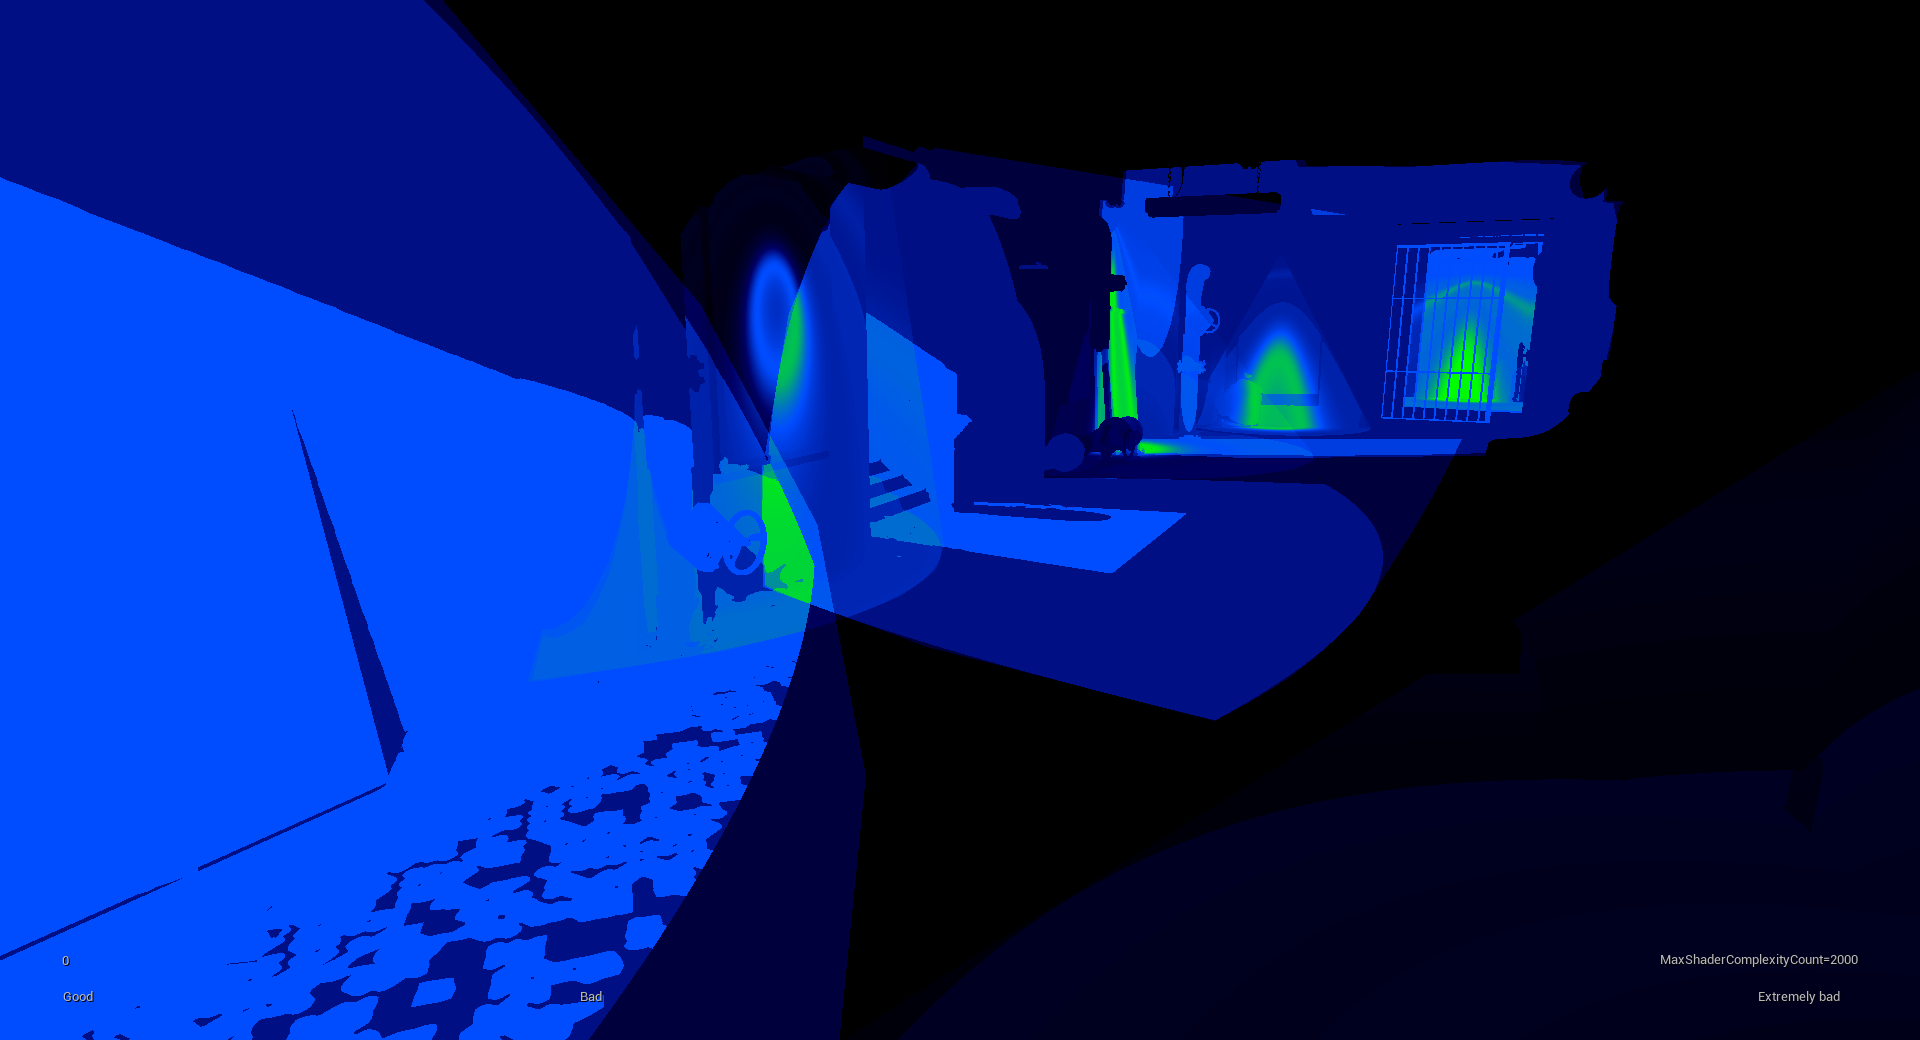
Optimization of Lighting:
To ensure the game was optimized with the lighting portion of the game, I have checked the Lightmap Complexity to make sure that I was within my light budget.